
??Ψ???ɤ????????ڡ????Хʡ??δ?????ˡ?ˤĤ???
????Ū?˥?ɥץ쥹???ǥ??????ڡ????ι??Τ????????硢???????ڡ??????٤˥Хʡ???????ɽ???????????????????????Τϸ?ΨŪ?ǤϤ????ޤ?????
?????ǡ??ǽ?????????ɽ???????ꤷ?Ƥ????????????ڡ???????λ????????ɽ???ˤ????Ȥ??????Ѥˤ??Ƥ????ȡ????????????ڡ????κݤˤϲ????ȥ??????????????ؤ???ɽ?????????????Ǥ??ΤǴ?ñ?Ǥ???
?ޤ??????????ڡ????Хʡ??ϥإå????β??????ꤷ?Ƥ????С????Ȥϰ쥫???????Ǥ??Τǡ???ʬ?⤢???к??Ȥ????????ޤ???
?Ǥϡ??ʲ??˶???Ū?ʼ??????????ޤ??????̤??Ѹ??ˤʤäƤ??ޤ????????????֤??Ѥ????ޤ????ΤǤ?λ??????????
When regularly announcing campaigns on WordPress, it is not efficient to display or remove banner ads for each campaign individually.
Therefore, it??s better to set the advertisement to display only initially and make it invisible once the campaign ends. This way, for the next campaign, you only need to replace the image and destination link, which is much simpler.
Additionally, if you set the campaign banner just below the header, you only need to work on one location, and the task can be completed in about three minutes.
Now, here are the specific steps. Please note that the screen is displayed in English, but the operation positions remain the same.
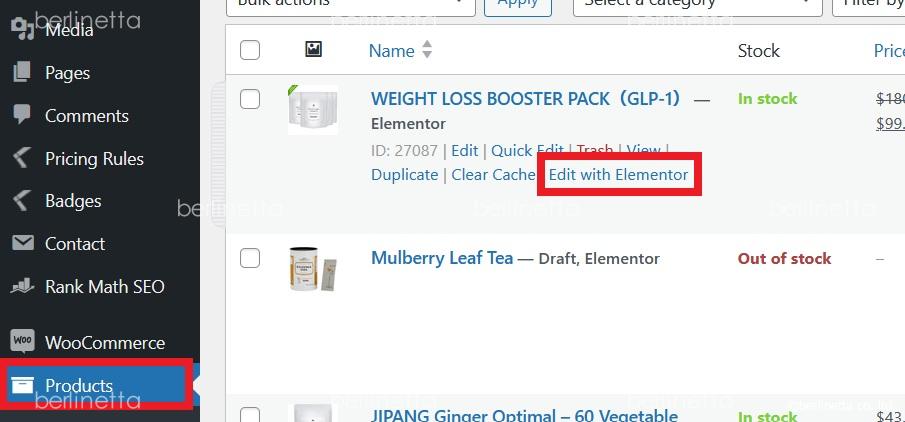
?Хʡ???ɽ??????ɽ???????ؤ??ˤĤ???
?ޤ??ǽ??ˡ?Woocommerce?????ʥڡ?????Edit with Elementor ???鳫???ޤ???
First, open the WooCommerce product page using Edit with Elementor.
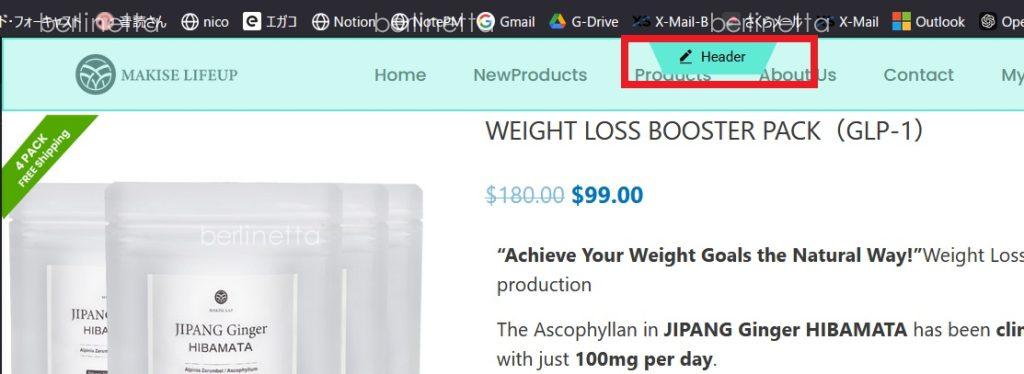
???ˡ??إå?????ʬ?????????ơ??إå??????Խ????̤?ɽ???????ޤ???
Next, select the header section and display the header editing screen.
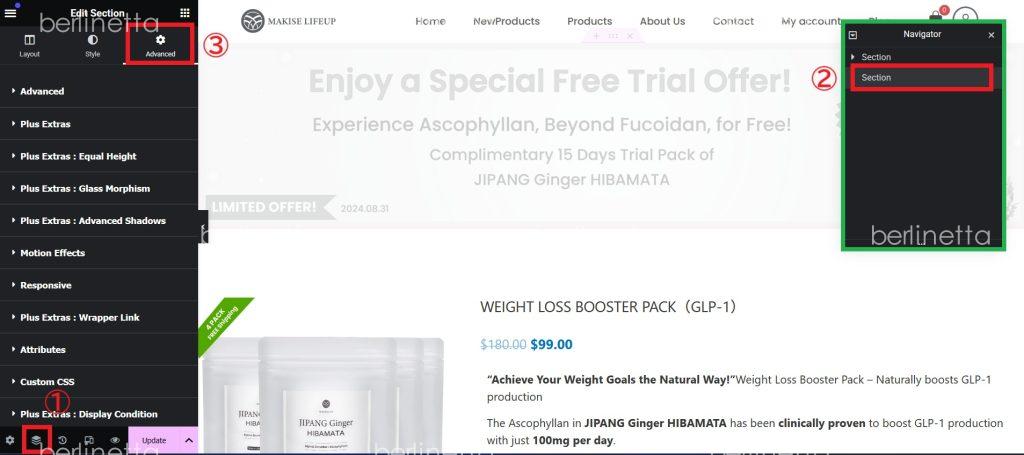
???????????˥塼?β??Ρ?navigater?פ??????å??????ȡ???¦??Navigater???????ɥ???ɽ???????ޤ???
?????ϴ??˲????˺????ѤΥХʡ?????????ɽ???ξ??֤ˤʤäƤ??ޤ??Τǡ????Ȥ??Ǥ????褦??ɽ?????֤??ڤ??ؤ??ޤ????????ܤ? Selection ???Хʡ??Υѡ???j?ˤʤ??ޤ??Τ?????????Advance ???֤??ڤ??ؤ??ޤ???
Click on “Navigator” at the bottom of the left control menu, and the Navigator window will appear on the right.
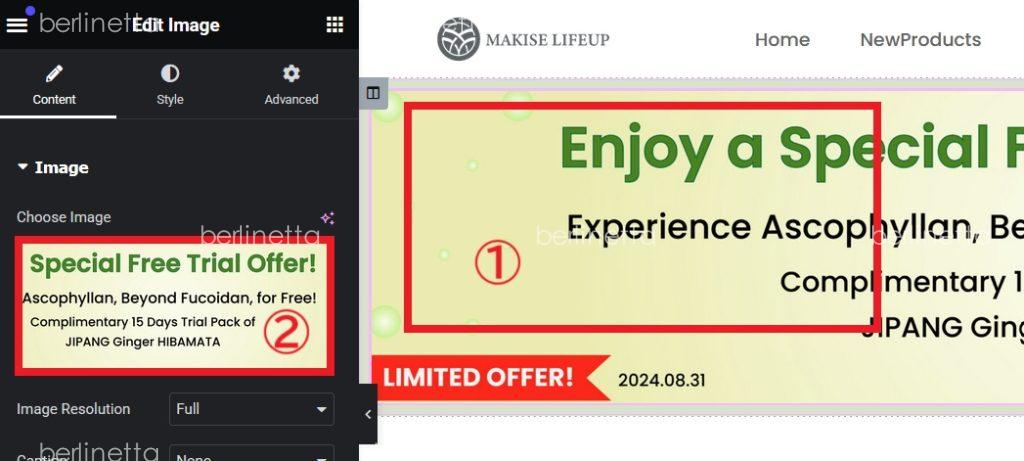
In this case, a previously created banner image is already in a hidden state, so switch it to a visible state to make it editable.
The second Selection corresponds to the banner part, so select it and switch to the Advanced tab.
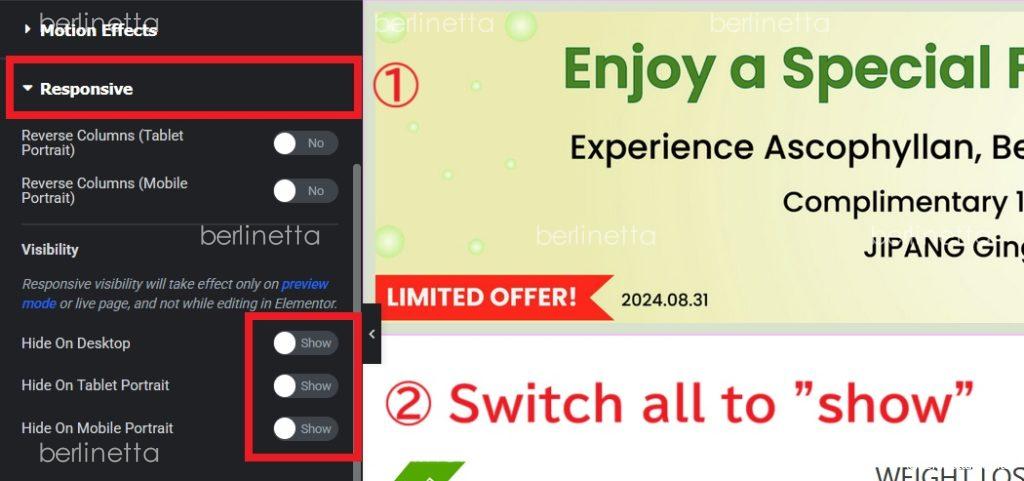
??????뤷?ơ?Responsive ???֤?ɽ???????????ǥХ???????ɽ????Hide?ˤˤʤäƤ????ս???ɽ????Show?ˤ??ѹ????ޤ????????ȡ????졼?????Ȥ????Ƥ????Хʡ????????ƥ??֤ˤʤ??ޤ???
Scroll down to display the Responsive tab, and change the setting from Hide to Show for all devices. This will activate the banner that was previously grayed out.
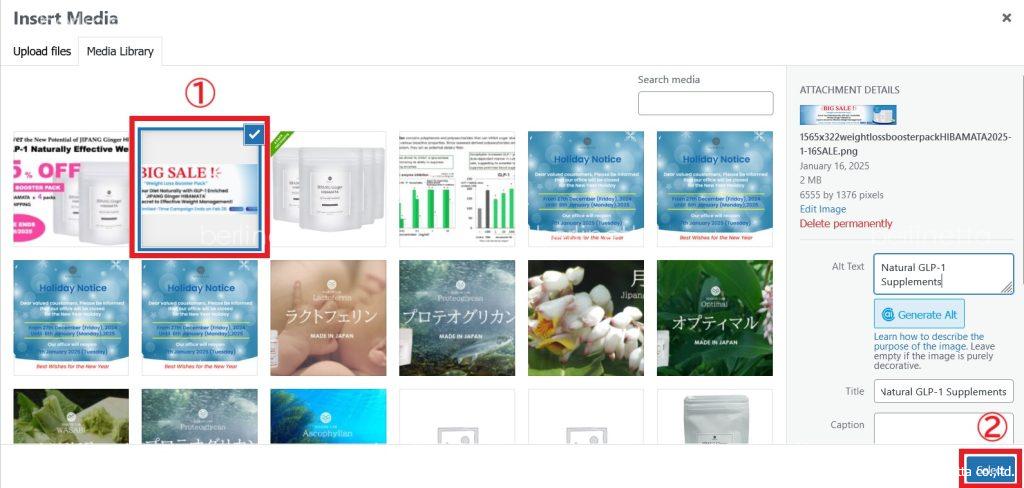
?????ƥ??֤ˤʤä??顢?Хʡ????????Dz??????????å???????¦?Υ??˥塼??ɽ?????줿?Хʡ????????å????ޤ???
Once the banner is activated, click on the image in the banner. Then, click on the banner displayed in the menu on the left side.
???????Ѥ???campaign?ΥХʡ??????????ޤ???
Select the banner for the campaign you will use this time.
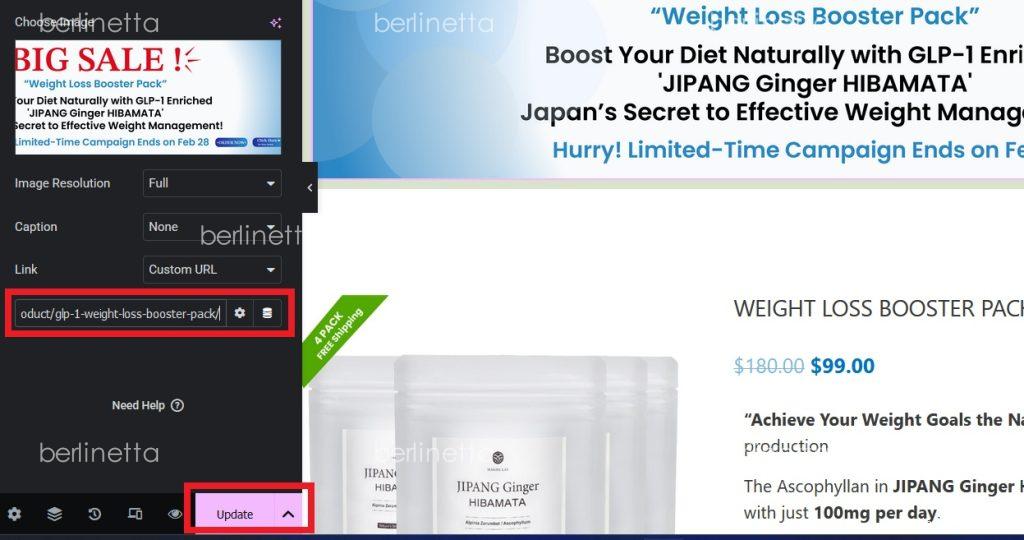
?Хʡ????????å????????Υ?????????˺?줺???ѹ????ơ?Update ?ܥ???????????ȿ?Ǥϴ?λ?Ǥ???
Don??t forget to update the link destination for the banner when clicked. Once done, click the Update button to apply the changes.
?ʾ??ǡ??Хʡ??????κ????ؤ????Ȥϴ?λ?Ǥ???
???????ڡ?????λ???κ???
???????ڡ???????λ?????????ǡ?Responsive ?? Show ?? Hide ???ڤ??ؤ?????????OK?Ǥ???
When the campaign ends, simply switch Show to Hide in the Responsive tab, and you’re all set.
